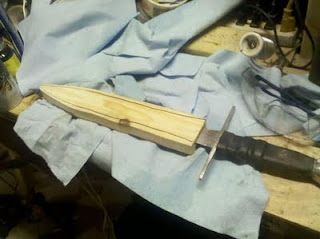
So for a while I have been wanting a good broad dagger. More so I have been wanting to
make a good companion dagger. A companion dagger for those of you asking is a dagger that while could still be used on its own as a weapon, is also designed to be used in conjunction with a longsword or if you've got the skill and strength a bastard sword also called a hand and a half sword. While at work an idea struck me. A cats paw pry bar is just about the right shape for a dagger blade. As soon as the idea planted i had to run with it.
So there it began, on the first day. first thing I did was to heat the crook part and pound it out flat. once there I cut the pattern of the blade out with my angle grinder and a metal cutting disk. From there shaping commenced with a couple sanding wheels.
That took a couple hours to do. Once I had it all roughed out I started on the cross guard and pommel. I made each piece out of scrap steel I had kickin around the garage. The cutout and sanding wheel served me well in those acts and the process took a few more hours. the handle came last, I made a cut out into a piece of hickory hardwood floor and glued a second piece on top to make a cavity. and that took the rest of the first day.
a week later I picked it back up. The handle was my next project. The glue had had time to work and now it was time to make it a proper handle. I set to work with a sander and a saw to get the shape and once i had it roughed out some finer sanding got it smother. I added to strips of leather to make the grip better using gorilla glue, witch in retrospect was a mistake as it took several hours to dry. epoxy works faster with the same result.
Next I finished shaping the pommel and blade with my 7inch power sander and a 120 grit disk.it always amazes me how fast sandpaper will take down steel. and how hot it gets. I have two new burn scars from friction heat on this blade touching my arm and hand. After all that cut out a piece of black leather and wrapped it around the handle then stitched it up to make a nice wrap.
It turned out decent. All that remained was to put it all together. A little JB weld helped patch some spots that didn't quite mesh. Next came the sheath i cut three pieces of cedar and traced the blade on one, then cut it out and glued each of the three together. and that was all for that day. a week later came back and finished polishing the blade with sandpaper and files. Then came the sharpening with a combination of files and a four sided diamond stone. about 2 hours worth of work there.
And so far thats as far as I am. I still have the sheath to finish and that will be the next post.


